Build a Simple CRUD App in Next.js: Step-by-Step Guide for 2026
May 14, 2026
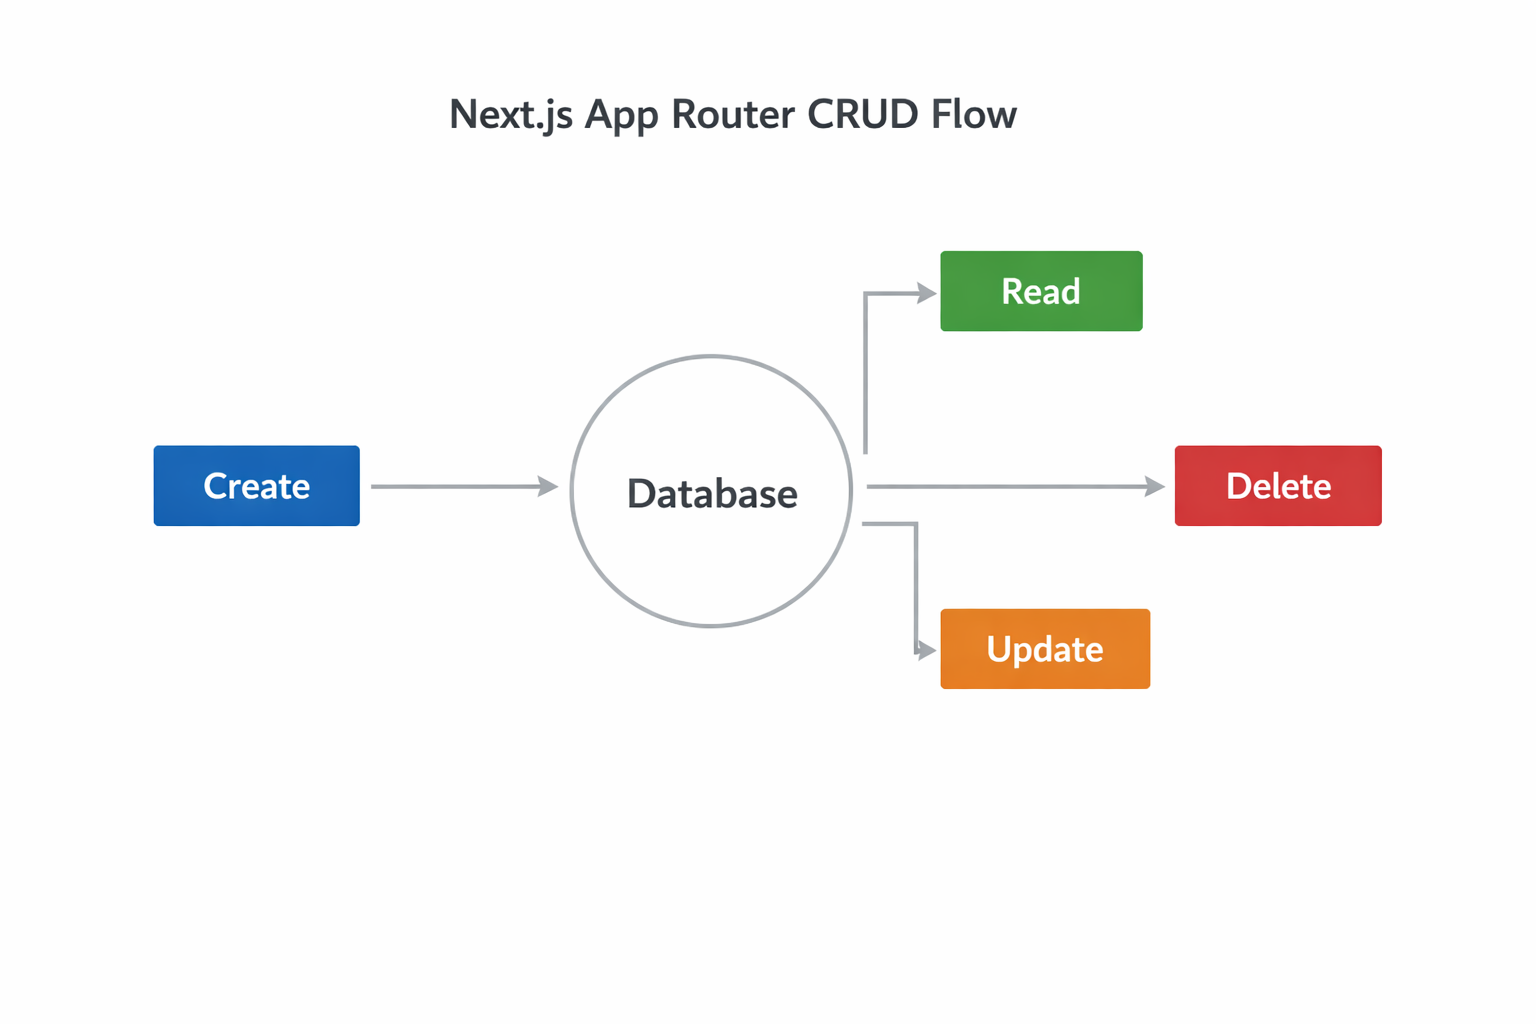
A CRUD app—short for Create, Read, Update, Delete—is the simplest useful pattern in application development. It represents the core lifecycle of data in a system: users add records, view them, edit them, and remove them. If you can build a clean CRUD app well, you already understand a large portion of real-world web development: forms, server-side data access, validation, routing, caching, and user feedback.
In 2026, Next.js App Router is the modern choice for this kind of project because it gives you a full-stack React framework with file-based routing, Server Components, Server Actions, and built-in caching/revalidation primitives. The App Router is designed around React’s latest server-first patterns, which makes it a strong fit for CRUD workflows where data mutations and UI updates need to stay in sync. Next.js also provides dedicated conventions for loading and error states, making the app easier to reason about as it grows. (nextjs.org)
This guide walks through building a simple but production-shaped CRUD app with Next.js, TypeScript, the App Router, Server Components, and Server Actions. The example stays intentionally lightweight so you can adapt it to a real database later, but the architecture is the same one you would use in a team codebase. We’ll focus on patterns that scale: separating data access from UI, revalidating after mutations, handling empty and loading states, and preparing the app for deployment on Vercel. Next.js can be deployed to Vercel with minimal configuration, and Vercel’s platform is built specifically around Next.js workflows. (vercel.com)
1. Project Setup: Create the App with create-next-app, TypeScript, and App Router
Start by scaffolding a new Next.js project with TypeScript and the App Router enabled. The official Next.js documentation recommends using create-next-app to get a project configured with the modern defaults, including TypeScript support and the App Router directory structure. In 2026, this is the fastest way to begin a new app without spending time wiring up tooling by hand. (nextjs.org)
A typical setup command looks like this:
npx create-next-app@latest crud-nextjs-2026 --typescript --app
cd crud-nextjs-2026
npm run dev
When prompted, choose options that keep the setup simple and production-friendly. For a CRUD app, the most relevant choices are:
TypeScript: strongly typed props, form values, and data models
App Router: enables Server Components and Server Actions
ESLint: catches common bugs early
src/ directory: optional, but helpful for organization
Next.js App Router is file-system based and uses React Server Components, Suspense, and Server Functions, so the setup should reflect that architecture from day one. This matters because CRUD apps benefit from server-first rendering: list pages can render data directly on the server, while forms can post back using server actions instead of requiring a separate API layer for every interaction. (nextjs.org)
Once the app is created, run the development server and verify the starter page. Then decide on the stack for persistence. For a tutorial, you can start with an in-memory array or a lightweight file-based store. For a real application, you would likely connect to a database and a data access layer, but the UI patterns in this guide stay the same. The important part is to treat the Next.js app as a full-stack boundary, not just a frontend shell.
2. Folder Structure and Data Model: Organize Routes, Components, and a Simple Entity Schema
A clean folder structure keeps CRUD code maintainable. The App Router convention works well here because each route maps directly to a folder. For a single-entity app—say, managing tasks, books, or contacts—you can keep the structure compact while still separating concerns.
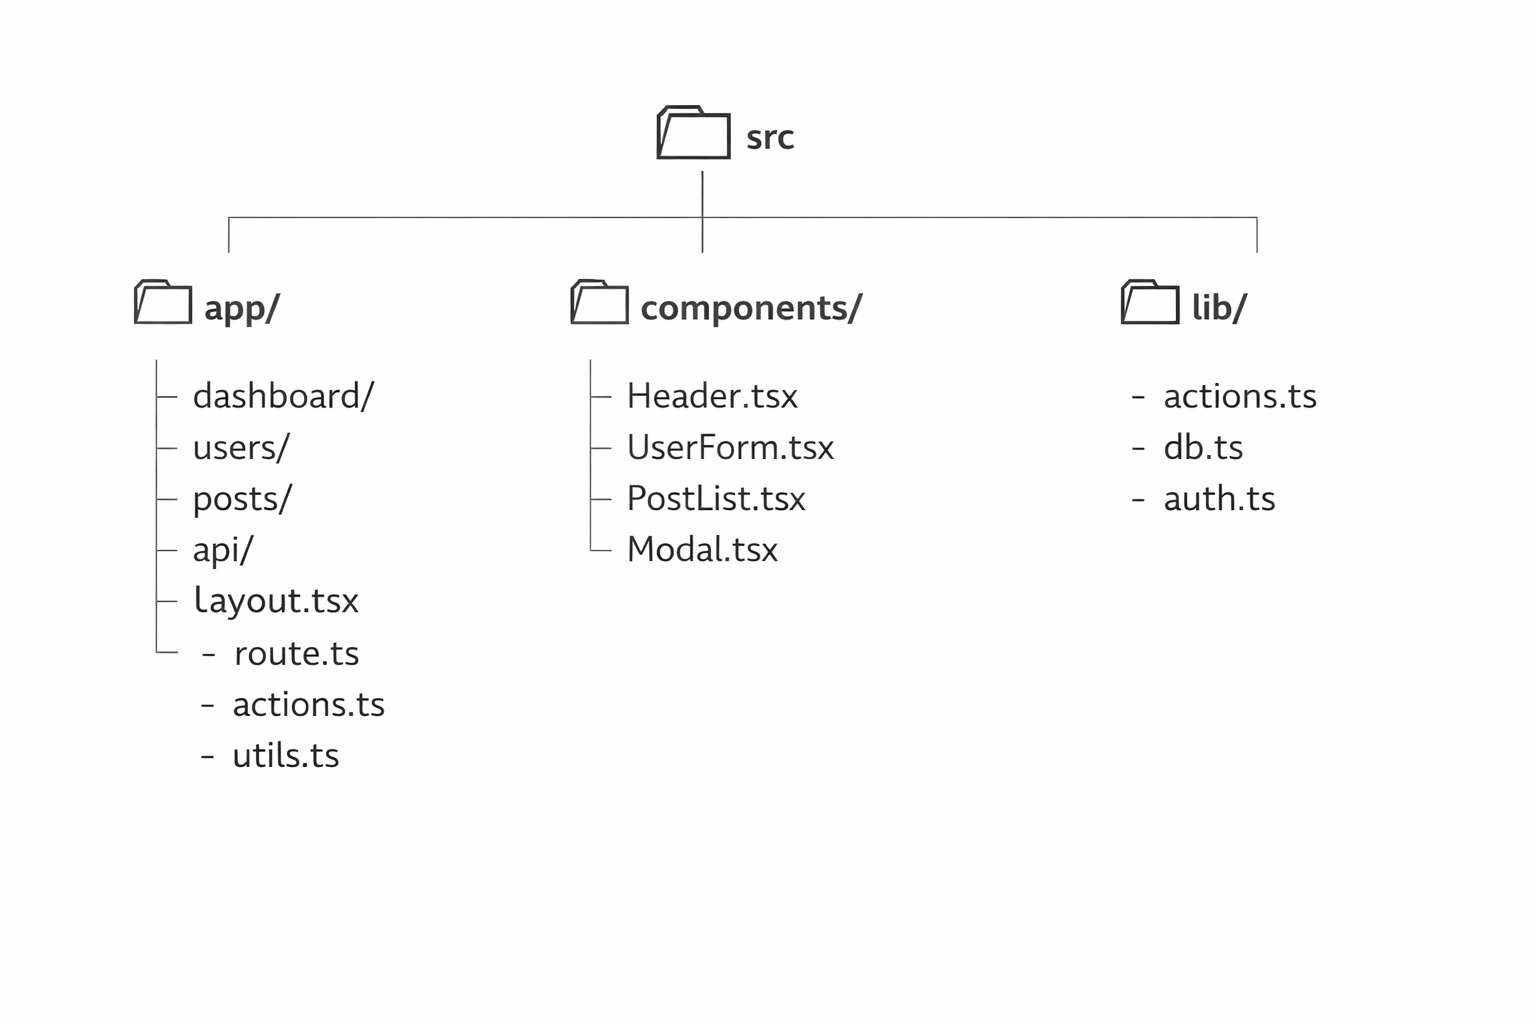
A practical layout might look like this:
src/
  app/
    page.tsx
    items/
      page.tsx
      new/
        page.tsx
      [id]/
        page.tsx
        edit/
          page.tsx
    actions.ts
    loading.tsx
    error.tsx
  components/
    item-form.tsx
    item-list.tsx
    delete-button.tsx
    empty-state.tsx
  lib/
    data.ts
    types.ts
This structure mirrors the lifecycle of a CRUD app:
items/page.tsxfor the list viewitems/new/page.tsxfor createitems/[id]/page.tsxfor detail/readitems/[id]/edit/page.tsxfor updateapp/actions.tsfor server mutationslib/for reusable data and type definitions
A simple entity schema should reflect the minimum useful fields. For example, a Task might be:
export type Task = {
  id: string;
  title: string;
  description: string;
  completed: boolean;
  createdAt: string;
  updatedAt: string;
};
For a beginner-friendly tutorial, keep the schema small and obvious. Use ISO date strings for timestamps and a string id so route parameters are easy to work with. The goal is to design a model that is easy to render, edit, and validate. If you add more fields later, you should still be able to preserve the same route and form structure.

At this stage, also decide where your data source lives. If you are mocking data, place the storage logic in lib/data.ts so the rest of the app doesn’t care whether the records come from memory, a database, or an external API. This separation is important because App Router encourages server-side data access, and keeping business logic out of the UI makes the app easier to evolve.
3. Building the Read View: Fetch and Render Records with Server Components
The read view is the heart of most CRUD apps. It is where users see the current state of the data, and it is often the first screen they land on. In Next.js App Router, the natural approach is to render this page as a Server Component, which means the data can be loaded on the server and sent to the client already rendered. Next.js App Router is built around Server Components, and its caching model supports server-rendered lists efficiently. (nextjs.org)
A basic list page can be asynchronous:
// src/app/items/page.tsx
import { getTasks } from "@/lib/data";
import Link from "next/link";

export default async function ItemsPage() {
  const tasks = await getTasks();

  return (
    <main>
      <div className="flex items-center justify-between">
        <h1>Tasks</h1>
        <Link href="/items/new">New Task</Link>
      </div>

      {tasks.length === 0 ? (
        <p>No tasks yet.</p>
      ) : (
        <ul>
          {tasks.map((task) => (
            <li key={task.id}>
              <Link href={`/items/${task.id}`}>{task.title}</Link>
            </li>
          ))}
        </ul>
      )}
    </main>
  );
}
Because the component runs on the server, you can fetch data directly without creating a separate REST endpoint for the page. That keeps the code simpler and reduces duplication. It also lets you build a more efficient read path, because Next.js can combine server rendering with its caching model. By default, Next.js provides caching and revalidation primitives like revalidatePath and revalidateTag, which are useful after mutations. (nextjs.org)
For a professional-quality read view, make sure it includes:
a clear heading and CTA for creating a new record
empty-state handling
stable links to detail and edit pages
a compact summary of each record
loading behavior for route transitions
A common pattern is to keep the list UI simple and push richer interactions into detail or edit routes. That keeps the page fast and easy to scan. If the list grows large, you can later add pagination or filtering without changing the basic rendering strategy.
4. Creating Records: Build Forms with Server Actions and Basic Validation
In the App Router, Server Actions are a first-class way to mutate data. Instead of wiring a form to a separate API endpoint and then manually syncing UI state, you can submit directly to a server function. Next.js documents Server Actions as its built-in solution for server mutations, which fits CRUD workflows very well. (nextjs.org)
A create form might look like this:
// src/components/item-form.tsx
type ItemFormProps = {
  action: (formData: FormData) => Promise<void>;
  defaultValues?: {
    title?: string;
    description?: string;
  };
};

export function ItemForm({ action, defaultValues }: ItemFormProps) {
  return (
    <form action={action}>
      <label>
        Title
        <input name="title" defaultValue={defaultValues?.title ?? ""} required />
      </label>

      <label>
        Description
        <textarea
          name="description"
          defaultValue={defaultValues?.description ?? ""}
          required
        />
      </label>

      <button type="submit">Save</button>
    </form>
  );
}
Then define a server action:
// src/app/actions.ts
"use server";

import { createTask } from "@/lib/data";
import { revalidatePath } from "next/cache";

export async function createTaskAction(formData: FormData) {
  const title = String(formData.get("title") ?? "").trim();
  const description = String(formData.get("description") ?? "").trim();

  if (!title || !description) {
    throw new Error("Title and description are required.");
  }

  await createTask({ title, description });
  revalidatePath("/items");
}
This pattern is powerful because validation and mutation live on the server, where the source of truth should be. For basic validation, you can start with manual checks like the example above. In a more mature app, you might add schema validation, but the core workflow stays the same: parse input, validate, write, then revalidate the relevant route. Next.js explicitly supports calling revalidatePath or revalidateTag in Server Actions to invalidate cached data immediately. (nextjs.org)
A few practical tips:
Use
requiredfields for basic HTML-level validation.Trim strings before saving.
Return friendly errors instead of failing silently.
Disable duplicate submissions if the save takes time.
Revalidate the list route after a successful create.
For a clean user experience, keep the form component reusable. You will use the same form for both create and update flows, which avoids duplicating labels, input names, and validation behavior.
5. Updating Records: Edit Flows, Form Defaults, and Mutation Handling
Update flows are usually where CRUD apps start to feel real. Users expect to open a record, see the current data pre-filled in a form, make edits, and save the result without friction. In App Router, the cleanest approach is to reuse the same form component from the create flow, but provide existing values as defaults.
A typical edit page can fetch the record on the server and pass its values into the form:
// src/app/items/[id]/edit/page.tsx
import { getTaskById } from "@/lib/data";
import { ItemForm } from "@/components/item-form";
import { updateTaskAction } from "@/app/actions";

export default async function EditTaskPage({
  params,
}: {
  params: Promise<{ id: string }>;
}) {
  const { id } = await params;
  const task = await getTaskById(id);

  if (!task) {
    return <p>Task not found.</p>;
  }

  return (
    <ItemForm
      action={updateTaskAction.bind(null, task.id)}
      defaultValues={{
        title: task.title,
        description: task.description,
      }}
    />
  );
}
And the update action:
"use server";

import { updateTask } from "@/lib/data";
import { revalidatePath } from "next/cache";

export async function updateTaskAction(id: string, formData: FormData) {
  const title = String(formData.get("title") ?? "").trim();
  const description = String(formData.get("description") ?? "").trim();

  if (!title || !description) {
    throw new Error("Title and description are required.");
  }

  await updateTask(id, { title, description });
  revalidatePath("/items");
  revalidatePath(`/items/${id}`);
}
This is a strong pattern because it keeps the mutation logic close to the server, where it can safely access your data layer. It also shows why route-based structure is so helpful: create and edit flows are nearly identical, and the differences are mostly about default values and which action gets called.
When implementing update behavior, pay attention to these details:
prefill forms with the current record state
preserve the record ID in the server action
show a not-found state for invalid IDs
revalidate both the list view and the detail page after saving
give feedback if validation fails or the save throws
If you want better UX, you can add a “Save changes” loading state on the submit button. Because server actions are still networked operations, users need visible feedback that the update is happening. The App Router makes it easy to pair this with route loading UI and server-rendered detail pages.
6. Deleting Records: Safe Delete Actions, Confirmations, and UX Feedback
Delete operations should be deliberate. Even in a simple CRUD app, destructive actions need safeguards so users do not accidentally remove data. The App Router supports this well because delete can be implemented as another Server Action, and the UI can remain small and focused.
A delete button can trigger a confirmation before submitting:
// src/components/delete-button.tsx
type DeleteButtonProps = {
  onConfirm: () => Promise<void>;
};

export function DeleteButton({ onConfirm }: DeleteButtonProps) {
  return (
    <button
      type="button"
      onClick={async () => {
        const ok = confirm("Delete this record?");
        if (!ok) return;
        await onConfirm();
      }}
    >
      Delete
    </button>
  );
}
The action itself should remove the record and then revalidate the relevant route:
"use server";

import { deleteTask } from "@/lib/data";
import { revalidatePath } from "next/cache";

export async function deleteTaskAction(id: string) {
  await deleteTask(id);
  revalidatePath("/items");
}
After deletion, users should be taken back to a safe place, usually the list page. If the deleted record had its own detail route open, you can navigate away after success. For a more polished app, show a toast or inline message confirming that the record was removed.
In production, deletion deserves a bit more care than a demo often shows:
require an explicit confirmation
keep the delete button visually distinct
handle missing IDs gracefully
revalidate the list after removal
consider soft delete if records should be recoverable
The main goal is confidence. A user should never wonder whether they clicked the right button or whether the app did something irreversible without warning. Even if your MVP uses a simple browser confirmation dialog, that is still better than an instant destructive action.
7. State, Caching, and Revalidation: Use Next.js Caching Correctly After Mutations
CRUD apps live and die by data freshness. If a user creates, edits, or deletes a record, the UI must reflect that change immediately. Next.js App Router gives you multiple caching layers, including server-side data caching and a client-side router cache. The official docs explain that Next.js caches route segments and can invalidate data immediately with revalidatePath or revalidateTag from Server Actions. (nextjs.org)
For a simple CRUD app, the easiest rule is:
Read pages can be cached if the data is stable.
Mutations should always trigger revalidation.
List pages should be revalidated after create, update, and delete.
Detail pages should be revalidated when the corresponding record changes.
If you are fetching data with fetch, Next.js lets you control caching with options like cache: "force-cache" and next.revalidate. The caching guide also notes that the Router Cache stores RSC payloads for route segments, which improves navigation speed and preserves UI state across transitions. (nextjs.org)
A practical strategy for this tutorial is:
Render list and detail pages as Server Components.
Use Server Actions for all mutations.
Call
revalidatePath("/items")after changes.Call
revalidatePath(/items/${id})after edits.Add tags later if you need finer-grained invalidation.
This prevents stale data from lingering in the UI. It also avoids common bugs where the list changes in the database but the page keeps showing old content because the server cache was not refreshed.
Here is the core mental model:
Server Component rendering gives you fresh data on the server.
Caching makes repeated requests faster.
Revalidation tells Next.js when cached content is no longer valid.
Router refresh/navigation can bring the client UI up to date.
If you need very fine-grained invalidation in a larger app, tags are the next step. But for a simple CRUD app, path-based revalidation is usually enough and much easier to reason about.
8. Error Handling and Loading States: Optimistic UX, Route Loading, and Empty States
Good CRUD apps feel responsive even when network operations are in progress or something goes wrong. Next.js App Router gives you dedicated conventions for this: loading.tsx for loading UI and error.tsx for route-level errors. The docs describe how these files fit into the App Router’s rendering model and how loading states can be reused during navigation. (nextjs.org)
Start with route-level loading:
// src/app/items/loading.tsx
export default function Loading() {
  return <p>Loading tasks...</p>;
}
Then add an error boundary for the route segment:
// src/app/items/error.tsx
"use client";

export default function Error({
  error,
  reset,
}: {
  error: Error;
  reset: () => void;
}) {
  return (
    <div>
      <p>Something went wrong: {error.message}</p>
      <button onClick={() => reset()}>Try again</button>
    </div>
  );
}
For forms, keep error handling straightforward. If a validation error occurs, the server action should return or throw in a way the UI can surface clearly. A real app might use form libraries or field-level errors, but even simple inline messages are a major improvement over generic failures.
You should also design for empty states:
no records yet
search/filter returns no matches
record deleted successfully
record not found
Empty states are not edge cases; they are normal states in CRUD flows. A polished empty state should explain what happened and point the user toward the next action.
Optimistic UX is optional for a simple app, but worth mentioning. In a more advanced version, you can show a spinner on submit, disable buttons during mutation, or update the UI before the server round-trip completes. For a beginner-friendly build, the more important goal is to ensure the user always sees one of these states:
loading
empty
data present
error
confirmation
That clarity is what makes the app feel reliable.
9. Deployment and Next Steps: Environment Variables, Vercel Deployment, and Common Enhancements
Once the app works locally, deployment is straightforward. Next.js has first-class support on Vercel, and Vercel’s docs state that Next.js projects can be deployed with minimal configuration through the CLI or Git integration. The Vercel platform is designed around Next.js and provides built-in deployment workflows, preview URLs, and zero-downtime releases. (vercel.com)
Before deploying, move any environment-specific values into environment variables. Typical examples include:
database connection strings
API keys
application base URLs
feature flags
In Next.js, environment variables should live outside the codebase and be injected per environment. That keeps secrets out of git and makes local, preview, and production setups easier to manage.
A basic Vercel deployment flow is:
npm install -g vercel
vercel
Or connect the repository through the Vercel dashboard and let Git pushes trigger deployments automatically. Vercel also provides preview deployments for pull requests, which is especially helpful for CRUD apps because you can test schema changes and mutation flows before merging. (vercel.com)
After deployment, consider these common enhancements:
replace mock storage with PostgreSQL or another database
add form validation with a schema library
add pagination and sorting
support search and filters
add authentication and authorization
introduce soft delete and audit fields
add toast notifications and better inline errors
improve accessibility and keyboard navigation
add optimistic updates for faster perceived performance
A simple CRUD app is often the foundation of a much larger product, so the code you write now should be easy to extend later. The best sign of a well-built starter app is that swapping the storage layer or adding another field does not force you to redesign the whole project.
Conclusion
Building a CRUD app in Next.js App Router is one of the best ways to learn the modern React server model while also creating something practical. The approach in this guide keeps the app simple, but it still follows real-world patterns: Server Components for reads, Server Actions for mutations, route-based organization, revalidation after writes, and clear loading/error/empty states. Next.js’s App Router and caching tools are specifically designed for this style of app, and Vercel provides a natural deployment target when you are ready to ship. (nextjs.org)
Key takeaways:
Use the App Router for modern file-based routing and server-first rendering.
Keep the data model small and explicit so forms and routes stay simple.
Use Server Actions for create, update, and delete flows.
Revalidate pages after mutations so the UI never shows stale data.
Add loading, error, and empty states early for a better user experience.
Deploy to Vercel when the app is ready and use environment variables for secrets.
With these pieces in place, you have a solid CRUD foundation that can evolve into a real product without a major rewrite.